Hiking Photo Poses for Trails, Views, and Outdoor Trips
Try natural hiking photo poses for trails, viewpoints, backpacks, and outdoor trips, with simple tips for movement, phone angles, and safe framing.
By Pajoox Editorial Team · Jul 29, 2026
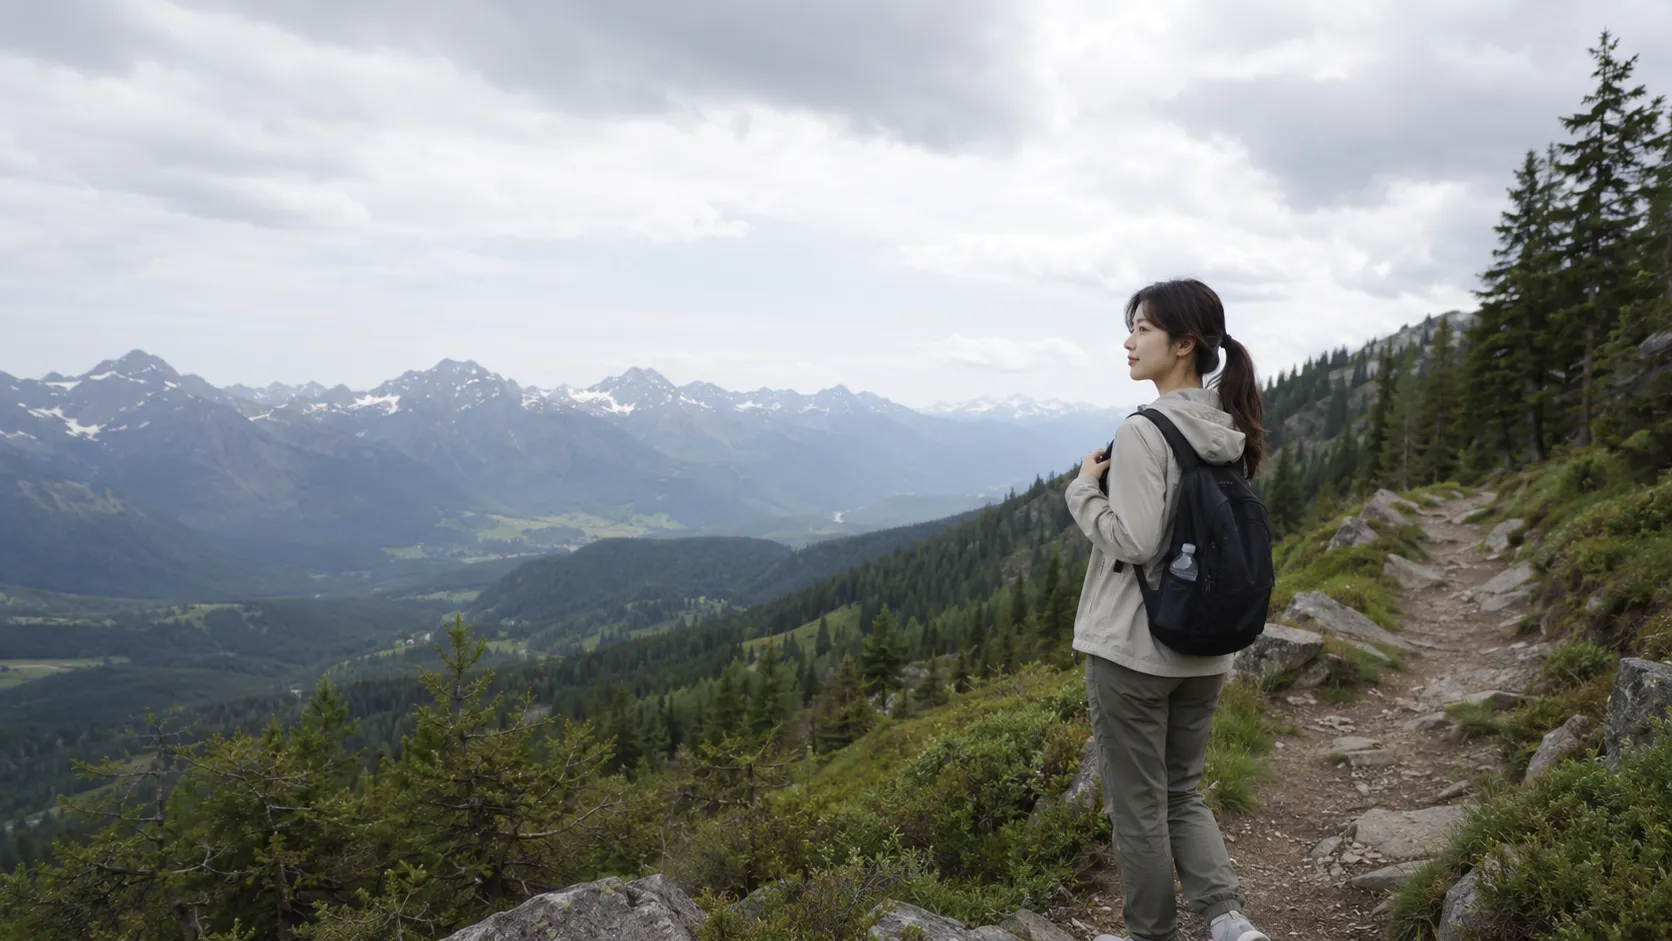
A hiking trail already gives you a story: the path behind you, the backpack on your shoulders, the changing light, and the view waiting at the top. But when someone takes out a phone, it can still be hard to know where to stand or what to do.
The most natural hiking photo poses usually come from actions that belong on the trail. Walk a few steps, adjust a backpack strap, look toward the view, or pause beside a trail marker. The goal is not to turn the hike into a photoshoot. It is to capture a few moments that still feel connected to the trip.
Start With a Walking Photo
Walking is the easiest place to begin because it already fits the setting.
Ask the photographer to stand on a safe, wide part of the trail and take several frames while you walk slowly toward them, across the frame, or away from the camera. Keep your arms relaxed and let your backpack move naturally.
Try:
- walking toward a viewpoint
- moving away and looking back
- stepping around a gentle bend
- walking beside a friend
Take smaller steps so the phone has time to focus. The photographer should capture the movement instead of waiting for you to freeze at the end. They should also stop in a stable position rather than walking backward on uneven ground.
Use the Trail as Part of the Composition
Trails, wooden paths, fences, and rows of trees can guide the viewer toward the person.
Place yourself slightly to one side instead of covering the path completely. Leave space in the direction you are walking or looking. A wide photo can show where the trail leads, while a medium frame can focus more on you and your backpack.
If the path curves, move the phone slightly so the curve remains visible.
Adjust Your Backpack Naturally
A backpack gives your hands something useful to do.
You can hold one strap, tighten a shoulder strap, check a side pocket, or briefly set the bag down at a safe rest area. Other natural options include holding a water bottle, checking a map, or adjusting a hat. The items you already carry usually work better than extra props.
Try a Back-Facing Viewpoint Photo
At a viewpoint, turn toward the landscape before turning toward the camera.
Stand well inside the safe viewing area and leave enough of the scenery visible around you. Keep your arms relaxed, hold your backpack straps, or place one hand on a permitted railing.
Take one photo from behind, one from the side, and one after turning back gently.
Do not climb barriers, sit on exposed edges, or step outside marked areas. A wider camera angle can create a strong sense of scale without putting anyone close to a drop.
Sit at a Safe Rest Spot
A seated photo can work well at a designated bench, picnic area, broad flat rock away from an edge, or another stable rest point.
Sit at a slight angle rather than facing the camera completely straight. Rest your hands loosely, hold a drink, look at the view, or adjust a boot lace if you are already stopping.
Bring the phone closer to your height and include part of the trail or landscape. Check that the surface is dry and stable before sitting.
Use Small Movements at the View
If standing still feels awkward, add one simple action:
- walk toward the overlook
- turn toward the view
- adjust a hat or jacket
- lift your face toward the light
- look at a friend, then back at the scenery
Take several frames while the action happens. Transitions often look more relaxed than a held pose.
Photograph Friends Without Making a Formal Line
For a group hiking photo, avoid placing everyone shoulder to shoulder in a perfect row.
Stand at slightly different angles, gather around a trail marker, walk together, or let one person point toward the view while the others react. One or two people can stand slightly ahead to add depth.
Keep the group off the main walking line and never block narrow paths.
Choose a Phone Angle That Shows the Scale
Eye level is a reliable starting point for hiking portraits.
A slightly lower angle can include more sky, trees, or mountain height. A higher angle may work for someone sitting at a rest area or for showing a patterned trail. Keep these changes subtle and make sure the photographer has secure footing.
Take three useful frames:
- A wide photo showing the landscape.
- A medium photo showing the person and trail.
- A closer photo for expression or hiking details.
Before switching to an ultra-wide lens, try stepping back. Very wide phone lenses can stretch people near the edges of the frame.
Work With Forest and Mountain Light
Light can change quickly along a trail.
In a forest, look for open areas where soft light reaches the face. Avoid placing the person in a small patch of bright sun while everything else remains dark. Moving a few steps may create a more even picture.
At an open viewpoint, side light can show shape and texture. When the sun is behind the person, tap the subject on the screen and adjust the exposure slightly if the face looks too dark.
Cloudy conditions can also work well because the light is often softer.
Take Solo Hiking Photos Safely
If you are hiking alone, use a timer or remote shutter only when you can place the phone on a stable surface in a safe, permitted area.
Keep the phone within sight, stay close to the setup, and avoid balancing it on unstable rocks or near water and cliffs. Do not leave the marked trail just to fit yourself into the frame.
A short video can capture safe walking from a fixed position, but the picture is optional; completing the hike safely matters more.
Find an Idea That Fits the Real Trail
A forest path, mountain overlook, lakeside walk, and desert trail do not offer the same space, light, or background.
Before choosing a pose, ask:
- What part of the trail makes this place memorable?
- Is there a safe action already happening?
- Should the person or landscape be the main focus?
- Would a wide, medium, or close frame work best?
- Can everyone take the photo without blocking the trail?
Pajoox helps you explore pose ideas, phone angles, composition guidance, and visual references based on the real scene in front of you. Instead of using the same hiking pose everywhere, you can start with the trail, light, terrain, and view that are actually there.
Final Thoughts
The best hiking photo poses are usually the ones that still feel like hiking.
Walk along the trail, adjust your backpack, look toward the view, or pause at a safe rest area. Use the path and landscape to shape the composition, and take wide, medium, and close versions before moving on.
Keep every setup quick and safe. A good hiking photo should help you remember the journey without pulling you away from it.